


Ever posted a great photo only to see it look blurry or cropped wrong? That hurts reach, wastes time, and dulls a strong message. The fix is simple. With a fast preset workflow, anyone can resize images for social media in under a minute, no design background required.
This guide shares exact 2025 image sizes for Instagram, Facebook, X (formerly Twitter), LinkedIn, TikTok, and YouTube. It also shows a fast 1-minute workflow, quality tips, and smart shortcuts for mobile and desktop. The goal is better fit, sharper images, more clicks, and more saves.
Keep a cheat sheet handy, set up presets once, and resizing becomes a 10 to 30 second step in any posting routine.
The 1-minute workflow to resize any image for social media
The fastest method works in any editor with presets or custom canvas sizes. Think of it as a three-step routine you can repeat for every post.
- Pick a preset for the platform and post type.
- Adjust the crop or padding so the subject stays centered.
- Export with clean, web-ready settings.
Mobile tip: use a tool that includes templates for Stories, Reels, Shorts, and feed. Desktop tip: build presets for 1:1, 4:5, 9:16, and 16:9, then duplicate as needed.
Templates save time. Start with a base design for each format, add the photo, then swap text or colors. Leave safe zones so faces, text, and logos do not sit near the edges where apps might hide them under UI.
Pick a preset that matches the platform and post type
Presets lock in pixel size and aspect ratio so your post does not get auto-cropped. Choose by goal:
- Square or 4:5 for feed engagement.
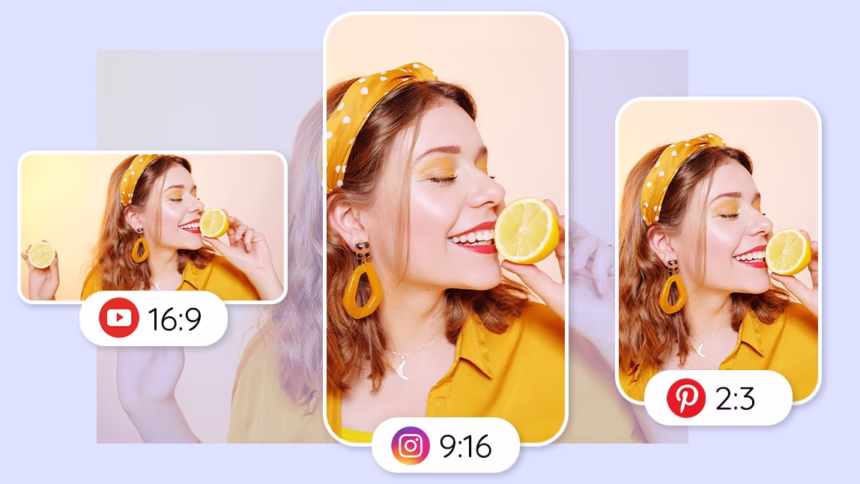
- 9:16 for Stories, Reels, and Shorts.
- 16:9 for YouTube thumbnails or horizontal posts.
Common presets:
- 1080 x 1080, aspect 1:1
- 1080 x 1350, aspect 4:5
- 1080 x 1920, aspect 9:16
- 1920 x 1080 or 1600 x 900, aspect 16:9
If your tool lacks the exact size, match the aspect ratio and use the largest recommended pixels. Bigger source files keep quality high after compression.
Crop, fit, or add padding to keep the subject centered
Two modes solve most issues:
- Fill crops edges to fill the frame. Great for tight portraits, products, and bold visuals.
- Fit keeps the full image and adds space around it. Add a blurred, gradient, or solid color background for a clean look.
Set a focal point so eyes, faces, or key text stay visible. Leave a 4 to 6 percent margin around the content for text overlays and profile crops. Vertical formats need extra headroom for captions and on-screen buttons near the bottom.
Export settings for crisp, small files
Use sRGB color for web. Pick formats by content:
- Photos: JPG or WebP. Start at 80 to 90 percent quality, then adjust down in small steps.
- Graphics or transparency: PNG or WebP.
Aim to keep most images under 2 MB for quick uploads. Name files clearly with platform and size, for example, productA-IG-1080×1350.jpg. After upload, check the preview for any auto-cropping on mobile and desktop.
Exact 2025 image sizes and aspect ratios that always fit
These sizes work well for most posts. Use the highest quality source you have, and double check platforms before big campaigns, since sizes can change.
Instagram sizes that stop awkward cropping
- Profile: 320 x 320 (square, shows as a circle)
- Feed posts: 1080 x 1080 (1:1), 1080 x 566 (1.91:1), 1080 x 1350 (4:5)
- Stories and Reels: 1080 x 1920 (9:16)
- Reels thumbnail: 1080 x 1920 (9:16)
Tip: Place key text in the center, since the grid preview crops to square.
Facebook sizes for posts, cover, and stories
- Profile: 196 x 196 (displays as a circle)
- Cover photo: 851 x 315 (about 2.7:1)
- Feed posts: 1080 x 1080 (1:1), 1080 x 566 (1.91:1), 1080 x 1359 (4:5)
- Stories and Reels: 1080 x 1920 (9:16)
- Link posts: 1200 x 630 (1.91:1)
Tip: Keep faces and logos away from the edges of the cover to avoid cropping on mobile.
X, formerly Twitter: posts and headers that fit
- Profile: 400 x 400
- Header: 1500 x 500 (3:1)
- Post images: 1080 x 1080 (1:1), 1080 x 1350 (4:5), 1600 x 900 (16:9)
Tip: Wide headers can crop on smaller screens, keep key text centered.
LinkedIn image sizes that look professional
- Profile: 400 x 400 (preferred)
- Cover photo: 1584 x 396 (4:1)
- Post images: 1200 x 627 (1.91:1)
- Company logo: 300 x 300
- Company cover: 1128 x 376 (about 3:1)
Tip: Use clean text and high contrast for LinkedIn, since many view on laptops during the day.
TikTok and YouTube vertical and thumbnail sizes
- TikTok profile: 200 x 200
- TikTok video and cover: 1080 x 1920 (9:16)
- YouTube channel icon: 800 x 800 (square)
- YouTube channel art: 2560 x 1440 total, safe center area around 1546 x 423 for desktop
- YouTube video thumbnail: 1280 x 720 (16:9)
Tip: Put critical text inside the center safe zone on channel art so it shows on all devices.
Keep image quality high without losing time
Use simple rules that keep images sharp and files small. Think clarity first, then speed.
Choose the right file type and compression
- Photos: JPG or WebP, start at 80 to 90 percent quality.
- Graphics, logos, or text-heavy designs: PNG or WebP.
- Avoid over-compressing. Check edges and gradients for banding.
- Keep colors in sRGB for consistent display.
- If the file is still large, lower quality in small steps, not all at once.
Upscaling without blur: when AI helps and when it hurts
If the original is smaller than the target, try a 1.5 to 2x AI upscale, then resize to the exact preset. Do not upscale more than needed, since it can create fake detail or halos. Add a light sharpen after resizing, not before. If the image is very small, consider a tighter crop or use a template background instead of extreme upscaling.
Color, DPI, and readable text
DPI does not matter on screens, pixel size does. Use sRGB for predictable color. Keep text large and bold enough to read on phones. Leave safe margins, about 5 percent of the canvas, so UI and captions do not cover words. For contrast, use dark text on light backgrounds or add a simple shadow or stroke.
Save hours with presets, templates, and automation
Turning one design into many sizes should take minutes, not hours. Work smarter with presets and simple file rules.
Batch resize one image for many platforms
- Create export presets for 1:1, 4:5, 9:16, and 16:9.
- Export all sizes in one click if your tool supports it, or queue them.
- Name files with platform and size, for example, summerSale-IG-1080×1350.jpg and summerSale-Story-1080×1920.jpg.
- Keep a shared folder for the team with version dates.
Smart cropping with focal points and safe zones
Set the subject as the focal point so auto-crop keeps faces and products visible. For 9:16, add extra space at the bottom for captions and buttons. For YouTube thumbnails, center the main subject and keep text large and short. Avoid placing logos in corners that may be covered by UI.
Reuse brand templates across sizes
Build a master design with styles for fonts, colors, and logos. Make variants for square, vertical, and horizontal. Move text blocks and buttons to stay inside safe zones, do not just stretch the canvas. Lock brand elements so only the image and headline change for each post.
Common mistakes and quick fixes
- Wrong aspect ratio, switch to the correct preset and re-center the subject
- Blurry image, start with a larger source or try a small AI upscale, then sharpen lightly
- Text cut off, increase margins and test on mobile preview
- Dull colors, convert to sRGB and raise contrast slightly
- File too big, drop quality a little or switch to WebP for photos
Conclusion
The promise is simple: choose a preset, center the subject, export smart, and post with confidence. The 2025 size cheat sheet above covers Instagram, Facebook, X, LinkedIn, TikTok, and YouTube. Save presets once, then reuse them daily so resizing becomes a 10 to 30 second step. Before publishing, preview uploads and double check sizes ahead of major campaigns since platforms can change. Next step: create presets for 1:1, 4:5, 9:16, and 16:9 today, then batch export the next post in under a minute.