


- Simple Mehndi Designs for Feet: Quick Start
- Tools and Prep for Simple Foot Mehndi
- Practice Strokes for Clean Lines on Feet
- Aftercare for Darker Foot Mehndi Stains
- How to Make Mehndi Darker on Feet
- Tools, Prep, and Practice Strokes for Simple Foot Mehndi
- Tools and quick prep checklist
- Practice strokes that make clean feet designs
- Simple Mehndi Designs for Feet: 15 Easy Ideas
- Minimal Anklet Band (8–10 min, Beginner)
- Toe-Ring Chain (5–7 min, Beginner)
- Paisley Side Trail (10–12 min, Easy)
- Half-Mandala Heel (12–15 min, Easy)
- Negative-Space Net (10–12 min, Easy)
- Dainty Flowers on Toes (7–9 min, Beginner)
- Curved Vines Across Arch (10–12 min, Easy)
- Dual Anklet with Dots (6–8 min, Beginner)
- Leaf Chain and Chevron (8–10 min, Beginner)
- Tiny Mandalas on Toe Bases (9–11 min, Easy)
- Spiral to the Instep (8–10 min, Beginner)
- Heart Lattice for Kids (6–8 min, Beginner)
- Sandal Strap Illusion (12–15 min, Easy)
- Side Anklet + Heel Dots (5–7 min, Beginner)
- Arabic Petal Trail (10–12 min, Easy)
- Aftercare, Smudge Fixes, and Beginner FAQs
- Aftercare checklist for deeper color
- Smudge prevention and quick fixes
- Beginner FAQs
- Q. How do you do simple mehndi on feet for beginners?
- Q. How long does mehndi last on feet?
- Q. Which mehndi is safe for feet?
- Q. How to make mehndi darker on feet?
- Q. How do I stop mehndi from smudging on toes?
Want simple mehndi designs for feet that look cute and take minutes, not hours? You’ll find 15 beginner-friendly ideas you can finish in 10–20 minutes, plus clear steps and photo cues.
Perfect for beginners, festival-goers, bridesmaids, moms, and DIY fans who love pretty feet without the fuss, See More: Arabic Mehndi Design: 20 Simple, Elegant Ideas with Images
Simple Mehndi Designs for Feet: Quick Start
Tools and Prep for Simple Foot Mehndi
- Wash and dry your feet. No lotion.
- Use a natural henna cone. Avoid black henna.
- Snip a tiny cone tip. Test lines on paper.
- Sit where you can rest your ankle on a pillow.
- Keep tissue, cotton swabs, a toothpick, and oil nearby.
- Work in good light. Keep feet still for 20–40 minutes.
Practice Strokes for Clean Lines on Feet
- Warm up with dots, short lines, and tiny teardrops.
- Try S-curves, small petals, and leaf shapes.
- For toes, use very light pressure and tiny taps.
- Draw in short segments on the arch. Rotate the foot, not your wrist.
- Count dots and leaves to match both feet.
Aftercare for Darker Foot Mehndi Stains
How to Make Mehndi Darker on Feet

- Leave the paste on 4–6 hours, or overnight if you can.
- Dab lemon-sugar mix once the paste is semi-dry.
- Keep feet warm. Use gentle heat or clove steam for 2–3 minutes.
- Scrape off dry paste. Do not wash with water for 6–8 hours.
- Rub a thin layer of coconut or olive oil before bed and before a shower.
- Avoid tight shoes and heavy scrubbing for 48 hours.
Tools, Prep, and Practice Strokes for Simple Foot Mehndi
Smudge-safe order matters. Work ankle to toes, outer to inner, toes last. This order saves your lines while you move and rotate the foot.
Choose a natural henna cone. Skip anything labeled black henna or with PPD. The FDA explains why “black henna” is risky and can harm the skin. See the fact sheet on temporary tattoos and black henna for details: Temporary Tattoos, Henna/Mehndi, and “Black Henna”. For allergy info, DermNet has a clear overview of PPD reactions: Paraphenylenediamine and hair dye contact allergy.
Keep your setup simple and steady. Sit where you can rest your ankle on a small pillow and keep still for 20–40 minutes. Work in good light. Test cone lines on paper first.
Stains love warmth and time. Later, use lemon-sugar dabs and gentle heat to help the stain deepen. Professional artists share great aftercare ideas, like these clear tips: Prep And Aftercare For Dark Henna Stains.
Tools and quick prep checklist
- Tools: natural henna cone (no black henna), tissue, cotton swabs, toothpick or a pin wrapped with cotton, medical tape (optional), lemon, sugar, small bowl, coconut or olive oil, hand fan or hair dryer on cool.
- Safety: patch test 24 hours before. Avoid products with PPD. Clean feet with soap, dry fully. Lightly wipe with alcohol if feet are oily. The FDA highlights black henna risks here: Temporary Tattoos, Henna/Mehndi, and “Black Henna”. DermNet explains PPD allergy signs here: Black henna tattoo reactions.
- Setup: sit where you can keep feet still for 20–40 minutes. Place a small pillow under your ankle. Keep wipes within reach.
- Cone prep: snip a tiny tip. Test line width on paper. Practice dots and thin lines before touching skin.
- Positioning: start with the non-dominant foot first if you want the easier foot last. Keep your pinky finger resting on Skin for control.
Practice strokes that make clean feet designs
- Warm-ups on paper, then on ankle: straight lines, tiny dots, teardrops, tight curves, S-curves, spirals, chevrons, leaf shapes, tiny grids.
- Toes: use very light pressure, micro dots, and short dashes. Turn the foot, not your wrist.
- Arches: draw in short segments. Pause and rotate the foot to keep lines smooth.
- Symmetry trick: count dots and leaves. Copy the same counts on the other foot.
- Breath cue: exhale as you pull a long line. It steadies hands.
Simple Mehndi Designs for Feet: 15 Easy Ideas

Each idea lists the look and placement, time and difficulty, steps with a smudge-safe order, one smudge tip or fix, a variation, a symmetry cue, and occasion tags.
Minimal Anklet Band (8–10 min, Beginner)
- Look: a thin anklet band with tiny leaves around the ankle.
Steps:
- Start at outer ankle. Mark tiny guide dots around the ankle.
- Connect dots into a slim band with light pressure.
- Add small paired leaves every half inch facing down.
- Draw a tiny clasp or charm on the outer side.
- Finish details, then move inward toward the inner ankle; toes last.
- Tip: rest your pinky on skin to steady the band.
- Variation: add a second dotted band 3 mm below the first.
- Symmetry: count leaves, match the count on the other foot.
- Occasion: Casual, Festival.
Toe-Ring Chain (5–7 min, Beginner)
- Look: dainty chains across the base of each toe.
Steps:
- Draw a thin curved line at the base of the big toe.
- Add 3–4 tiny dots under the line like a chain.
- Repeat a shorter curve on the next toe, outer to inner.
- Add a midline dot charm on big toe.
- Leave tips of toes for last to avoid smudges.
- Tip: fix wobbly dots with a toothpick tip.
- Variation: add a mini teardrop charm on the middle toe.
- Symmetry: mirror the curve direction on the other foot.
- Occasion: Casual, Photoshoot.
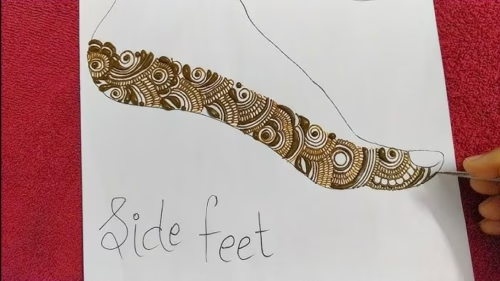
Paisley Side Trail (10–12 min, Easy)
- Look: small paisleys along the outer side from ankle to little toe.
Steps:
- Place 3 guide dots along the outer edge of the foot.
- Draw the first small paisley at the ankle dot.
- Add two more paisleys decreasing in size toward the little toe.
- Fill with tiny lines or dots, outer to inner.
- Add a dotted tail to the last paisley; toes last.
- Tip: use lighter pressure on fills to keep it neat.
- Variation: swap one paisley for a flower.
- Symmetry: keep the same number and spacing of paisleys on both feet.
- Occasion: Festival, Bridal-lite.
Half-Mandala Heel (12–15 min, Easy)
- Look: a half circle mandala centered on the heel.
Steps:
- Draw a half circle arc on the heel edge.
- Add scallops along the arc.
- Inside, add petals, then a ring of dots.
- Extend two short lines toward the arch, outer to inner.
- Add micro lines to petals; toes last.
- Tip: rotate the foot to keep arcs smooth.
- Variation: add a tiny central lotus instead of dots.
- Symmetry: match the number of scallops on both heels.
- Occasion: Festival, Photoshoot.
Negative-Space Net (10–12 min, Easy)
- Look: light lattice on the top of the foot with open gaps.
Steps:
- Draw diagonal lines from outer midfoot to inner side, spaced evenly.
- Cross with the opposite diagonal to form diamonds.
- Dot only the diamond intersections near the ankle.
- Leave gaps near toes clean; toes last.
- Add a thin border line near the ankle.
- Tip: use a ruler edge as a visual guide off-skin.
- Variation: add tiny hearts at two intersections.
- Symmetry: count diamond rows per foot.
- Occasion: Minimal, Casual.
Dainty Flowers on Toes (7–9 min, Beginner)
- Look: tiny five-petal flowers on the base of each toe.
Steps:
- On big toe base, dot a center.
- Add five small petals by tapping the cone.
- Repeat smaller flowers on two more toes, outer to inner.
- Add one dot trail toward the nail; toes last for the other foot.
- Tip: if a petal blobs, lift with a cotton-wrapped pin.
- Variation: swap petals for star dots.
- Symmetry: match which toes get flowers on each foot.
- Occasion: Casual, Kids.
Curved Vines Across Arch (10–12 min, Easy)
- Look: a swooping vine from outer heel toward inner arch.
Steps:
- Lightly mark a curved guide from heel to arch.
- Draw the main vine line with even pressure.
- Add small leaves alternating sides.
- Dot along the outer edge; move inward.
- Keep toes for last to avoid drag.
- Tip: draw leaves by pressing then pulling to a point.
- Variation: add a tiny bud at the arch tip.
- Symmetry: mirror the curve direction on the other foot.
- Occasion: Festival, Photoshoot.
Dual Anklet with Dots (6–8 min, Beginner)
- Look: two slim bands with dot spacing around the ankle.
Steps:
- Draw the top band at the ankle line.
- Add a second band 3–4 mm below.
- Place evenly spaced dots between bands, outer to inner.
- Add a tiny charm on the outer ankle.
- Tip: count 12–16 dots per side for even spacing.
- Variation: replace dots with tiny triangles.
- Symmetry: match band gaps on both feet.
- Occasion: Minimal, Casual.
Leaf Chain and Chevron (8–10 min, Beginner)
- Look: leaf chain along the outer foot with a small chevron near the toes.
Steps:
- Draw a short line along the outer edge.
- Add small paired leaves like a chain.
- Near the toe base, add a small V chevron.
- Dot the chevron tips; toes last.
- Tip: pull leaves toward you for sharp tips.
- Variation: add a second chevron closer to the ankle.
- Symmetry: repeat leaf count and chevron size on both feet.
- Occasion: Casual, Festival.
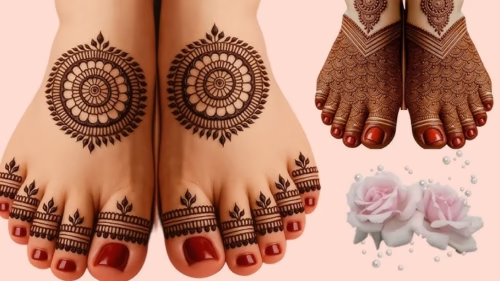
Tiny Mandalas on Toe Bases (9–11 min, Easy)
- Look: mini mandalas centered at the base of 3 toes.
Steps:
- On big toe base, draw a small circle.
- Add 6 small petals.
- Ring the circle with dots.
- Repeat on two more toes, outer to inner.
- Keep the smallest on the smallest toe; toes last on second foot.
- Tip: rotate the toe for even circles.
- Variation: swap dots for micro scallops.
- Symmetry: same toes on each foot get mandalas.
- Occasion: Photoshoot, Minimal.
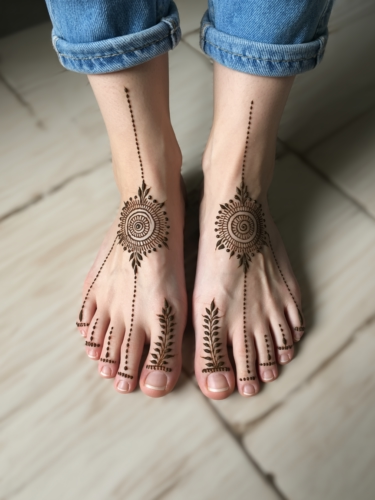
Spiral to the Instep (8–10 min, Beginner)
- Look: a neat spiral starting at the outer instep, curling inward.
Steps:
- Place a small dot start point on the outer instep.
- Pull a smooth spiral inward with steady pressure.
- Add tiny dots along the spiral path.
- Finish with a leaf at the end; toes last.
- Tip: exhale while drawing the spiral for control.
- Variation: add a second baby spiral beside it.
- Symmetry: spiral direction mirrors on each foot.
- Occasion: Casual, Minimal.
Heart Lattice for Kids (6–8 min, Beginner)
- Look: tiny hearts in a light grid on top of the foot.
Steps:
- Draw two faint diagonal guide lines.
- Place tiny hearts where lines cross.
- Add 1–2 dots between hearts.
- Stop before toes; keep toes clean for easy play.
- Tip: keep cone tip small to prevent blobs.
- Variation: swap hearts for stars.
- Symmetry: same number of hearts per foot.
- Occasion: Kids, Casual.
Sandal Strap Illusion (12–15 min, Easy)
- Look: thin strap lines across midfoot like chic sandals.
Steps:
- Draw a diagonal strap from outer midfoot to inner arch.
- Add a second parallel strap with 4 mm spacing.
- Place tiny dots along strap edges.
- Add a center jewel shape near the instep; toes last.
- Tip: use very light pressure for clean strap edges.
- Variation: add a third thin strap near the ankle.
- Symmetry: match strap angle on both feet.
- Occasion: Photoshoot, Festival.
Side Anklet + Heel Dots (5–7 min, Beginner)
- Look: a short anklet segment on the outer ankle with dotted heel accent.
Steps:
- Draw a 2-inch anklet curve on the outer ankle.
- Add tiny dots under the curve.
- Dot a small arc along the heel edge.
- Connect with 3 spaced dots; toes last.
- Tip: keep dots equal by tapping, not dragging.
- Variation: add a mini charm under the anklet.
- Symmetry: measure the anklet length on both feet.
- Occasion: Minimal, Casual.
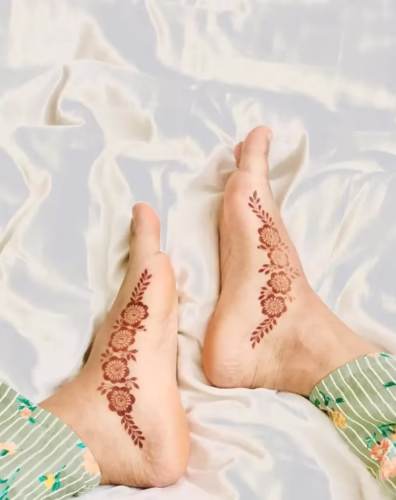
Arabic Petal Trail (10–12 min, Easy)
- Look: bold Arabic petals and leaves along the outer side.
Steps:
- Draw a bold teardrop petal near the ankle.
- Add a leaf flowing toward the little toe.
- Repeat petal-leaf pairs, smaller toward toes.
- Add dots to fill gaps; toes last.
- Tip: press, then lift for thick-to-thin strokes.
- Variation: add a small swirl at the trail end.
- Symmetry: same number of petal pairs per foot.
- Occasion: Festival, Bridal-lite.
Aftercare, Smudge Fixes, and Beginner FAQs
Short, clear, feet-only care and fixes. Keep stains deep, lines crisp, and toes happy.
Aftercare checklist for deeper color
- Let paste sit 4–6 hours, or overnight if possible.
- Dab lemon-sugar mix once paste is semi-dry. Do not soak.
- Keep feet warm. Use gentle heat or clove steam for a few minutes.
- Scrape off dry paste. Do not wash with water for 6–8 hours.
- Rub a thin layer of coconut or olive oil before bed and before shower.
- Avoid tight socks and heavy scrubbing for 48 hours.
- Learn about safe products and risks from the FDA: Temporary Tattoos, Henna/Mehndi, and “Black Henna”.
- PPD allergy basics from DermNet: Tattoo-associated skin reactions.
- Extra aftercare tips from pros: ❤️Henna Aftercare Instructions❤️.
Smudge prevention and quick fixes
- Work ankle to toes, outer to inner, toes last.
- Keep a toothpick and cotton-wrapped pin ready to lift fresh smudges.
- For small mistakes, scrape gently, let dry, redraw thinly.
- Let one foot dry while you work high on the other. Do not cross ankles.
- Use a hand fan or cool dryer to set lines.
- For toe work, plant heel and move toes only when needed.
Beginner FAQs
Q. How do you do simple mehndi on feet for beginners?
Start with anklets and dots, keep lines thin, follow ankle-to-toes order, practice on paper first, and keep sessions under 20 minutes.
Q. How long does mehndi last on feet?
Usually 7–14 days. Friction and water make it fade faster.
Q. Which mehndi is safe for feet?
Natural henna with no PPD or black dyes. Do a patch test. See safety notes: Black henna tattoo reactions.
Q. How to make mehndi darker on feet?
Lemon-sugar dabs, warmth, longer paste time, oil shield after removing paste, no water for 6–8 hours.
Q. How do I stop mehndi from smudging on toes?
Do toes last, keep lines short, dry with a fan, and do one toe at a time.